
In today’s world of nonstop content creation, we need to be able to separate ourselves from the bunch and elevate our brands in a unique way. Matching the product’s branding aesthetic to a non-white background is one way to do that. There are unlimited possibilities, but here are a few to get you started.
Receive free ecommerce & product photography tips
Contextual backgrounds
Try to envision where you may normally, naturally see your product being used and then brainstorm some ideas about how you could replicate that in your product photography. For example, if you were shooting a clothing brand, are these generally warm-weather or cold-weather clothes? Would you wear them to a casual park picnic, or more for a summer wedding? Then create *that* shoot, down to the details of props, models, environment, etc.
This is the basis of what it means to contextualize your product photography - find the lifestyle situation that the product would be shown at it’s best, and then create images to allow shoppers to see the product in a real-life situation.
While there’s a time and place for white background imagery, it’s a good idea to switch it up and give shoppers some variety. And contextual product shots can set your brand apart — only 1.53% of the product photos we analyzed from fashion brands were contextual shots.
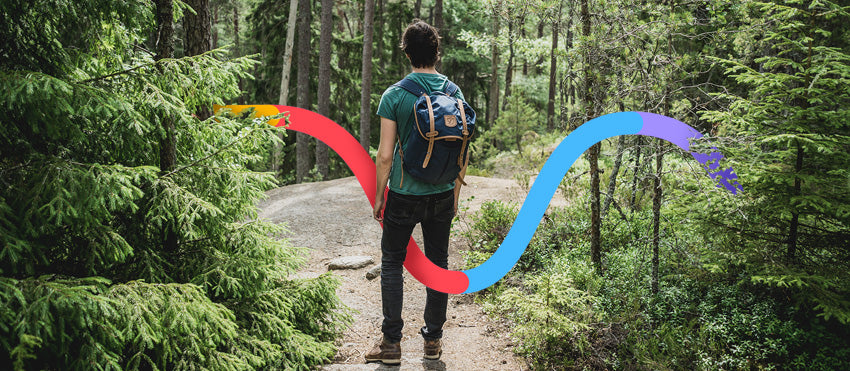
Ideally, you’ll shoot the product in an environment that showcases your brand’s aesthetic. For example, if your product is more athletic or outdoors in nature, bring your product on your next walk or hike and place it on some rocks with trees in the background, have a friend or model wear it on the hike with you and get candid images, or bring some leaves, flowers or rocks inside to your studio. If that isn’t possible, another great option is to add in a background in Photoshop, using either the magic wand tool or even outsourcing this editing.
If you’re interested in a few easily accessible places to shoot these lifestyle images, here are a few that I enjoy shooting in:
- Public parks
- Coffee shops or restaurants (these may require permits - see our link below)
- Hotel lobbies
- Downtown streets
- Nearby lakes or rivers
- Interesting walls around town
- Coworking spaces
We always want you to be aware that some places are more easily and freely available for photographers, and some places require permits. Here’s a great article of ours that will help you decide where to shoot - safely and legally!

(Photos: Taylor Prinsen Photography)

Textures and props
Textures and props add dimension and variety to your product photos, making them more interesting than a stark white background. It gives you creativity to play around with your shots, and you can display your products in exciting and interesting ways.
“Texture, colors, and prop styling are all key in product photography and tell a visual story for a brand.” – Shelby Bella, professional photographer
When choosing which textures and props to add to your product photos, consider the story you’re trying to tell, recommends professional photographer Shelby Bella. For example, “textures can further conceptualize images, give depth, and convey the ‘lifestyle’ aesthetic, which is tricky to do when it comes to still-life photography,” she says.
The same applies for props, too. “[Props] elevate images in both storytelling and composition. Texture, colors, and prop styling are all key in product photography, and when used correctly, they can tell a visual story for a brand.”
Here are a few textures you can try as a backdrop for your next product shoot:
Wood
Wood can work as a nice backdrop for more natural products. Think about what color and type of wood may match or contrast nicely with the color of your product.
Tile
There are many different designs of tiles, ranging from modern to historic, bright to neutral. Consider the product and what type of tile could complement the product most naturally.
Stone
Granite or various types of stone can instantly elevate the product - consider the look of a high-end cooking utensil on a granite countertop. Meanwhile, stones out in nature can bring a product more down to earth.
Mirrors or metal
Mirrors can be a fun way to play visual games and have fun with the product and image. Get a little creative with how you reflect the product placed on the mirror and where you focus the viewer’s eye when looking at the image. Metal can be similarly reflective, with another added layer of texture and grain.
Wrapping paper or wallpaper
Both of these can provide quick, easy, inexpensive texture and color variations to place your product against or on top of in your shoot.
Fabrics or linens
Some examples of these are silk, flannel, denim, velvet, felt - anything you have in a closet or a prop bin could be a great way to add dimension to the image.

(Photo: The Divine Manifest)

(Photo: Brian Carlton Closs)

(Photo: Taylor Prinsen Photography)

(Photo: Shelby Bella)
Colors
Certain colors can change the feel of the image for potential customers and knowing when to use specific colors is important for your future photoshoots. For example, take a look at this color emotion guide blog post and explore how colors like yellow can bring out feelings of warmth, joy and optimism, while red is more related to boldness and intensity.
In that way, if you are wanting to promote a product with a fun, energetic vibe, you may choose to go with a bright or neon backdrop with yellow, green, or orange. If the product is a luxury item, black or dark blue backgrounds can be great because they “create an elegant, sophisticated look”.
“Backgrounds for product photography play a huge role in setting the tone and space for storytelling,” says Food and Product Photographer Mackenzie Smith Kelly. For example, “if the product is not featured ‘in situation’’ (such as in a contextualized or lifestyle situation as mentioned in the first section), “the color and texture of a background hint to the audience how they should feel about a brand. Vibrant, colorful hues evoke different feelings than muted earth tones, but they both make us feel something.”
A question that all product photographers should be asking ourselves is “How do you want your audience to feel when they look at your photo?” - Mackenzie Smith Kelly
Start by brainstorming the emotions and ideas you want to evoke from the customer and then assess your product’s colors. Either choose to bring out or “highlight” colors that are less noticeable within the product, or contrast those colors with an oppositely colored backdrop.
Neutral colors (such as grey, beige, ivory, or lighter and less saturated hues of any color) can also be beneficial to include as backdrops when you are trying to convey a more serene or natural feel with the product image.
Play around with different colors and see which seems to make the most impact to you! Here are a few examples of images that either highlight colors already in the product itself or contrast the colors in the product.

(Photo: Mackenzie Smith Kelly)


(Photo: Caleb Kerr)
Depth of field
Bokeh, or a shallow depth of field, is the effect of a soft out-of-focus background that you get when shooting a subject, such as a product. This effect is achieved by setting the camera’s aperture to the widest possible, such as f/2.8 or down even to f/1.4 or f/1.2.
Bokeh is useful in product photography because the photographer is able to draw focus onto the product without having to brainstorm much about what the background itself will look like. Instead, the viewer’s eye is naturally drawn to the product and excludes what isn’t important.
Using bokeh can also create a dreamy or moody aesthetic without any extra planning, lighting, etc. This example from Katie Jameson Photography does a great job of focusing the product and letting the background fade away evenly and naturally into the background with bokeh.

(Photo: Katie Jameson Photo)
A few tips for shooting bokeh:
- Shoot with as wide of an aperture as possible and focus directly on the product.
- If possible, shoot with a fixed or “prime” lens, such as a 85mm or 50mm.
- Choose a subject that is either at a distance from the background, or you can move the product/subject as far away from the backdrop as possible. These will both help achieve bokeh.

Photo from DIY Photography.net
Mixing up your backgrounds
Getting creative with backdrops, models, colors, props, textures, and bokeh are just some ways to heighten your product’s imagery and set your brand apart from competitors. Try a few of these in exchange for a typical white backdrop next time and see if it doesn’t take the image and product to the next level!


![How to Create a Clipping Path in Photoshop [Updated for 2022]](http://pathedits.com/cdn/shop/articles/image14.jpg?v=1639448433 "How to Create a Clipping Path in Photoshop [Updated for 2022]")


