Product photography can be a hefty investment. It’s always good practice to look for ways to maximize this investment. One idea? Repurposing product photos for other uses.
So how do you do that? Transparent background images. When you put products on a transparent background, you can use them across the web in a variety of contexts and channels. This Photoshop tutorial will show you how to create a transparent background in Photoshop for your product shots.
Scroll down below the video for written tutorial.
How to make a transparent background in Photoshop
Step 1: Remove the background
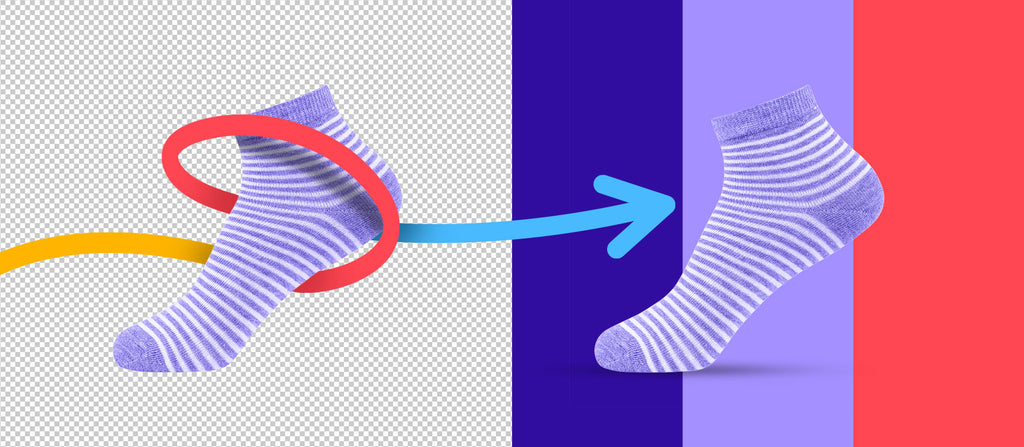
Open your product image in Photoshop. For this example, we'll use an image of a sock on a white background.

Go to your Layers panel and select the layer that contains your product image. If you’re working in a JPG, this will be your only layer, and it will be called Background.

Photoshop 2024 now has a “Remove Background” feature which allows you to make a transparent background with the click of a button.
To access this tool (if you don’t already see it on your screen), go to Window > Contextual Task Bar from the menu at the top of the application window. Make sure the Contextual Task Bar is checked by clicking on it in the menu.

The Task Bar will appear on or near your image.
Once you see it, click Remove background.

Photoshop will attempt to discern what is your object and what is your background, and show your product images without their background. However, your background isn’t gone; if you look in your Layers panel you’ll see the background is now masked.

Step 2: Refine the mask
Photoshop’s new Remove background tool does a pretty good job in most cases. However, it’s not always perfect. If part of the product is missing, or part of the background is showing, you can fix it by modifying the image mask Photoshop just created.
Select the mask within your Layers panel. The mask is the black and white icon just to the right of the image of your layer. When you select just the mask, a small black outline appears around the mask icon.

Once in your mask, use the Brush tool to “paint” parts of your image back if necessary. You can also use the Eraser tool to erase more portions of the background. You’ll also see options to Subtract from Mask and Add to Mask in the Contextual Task Bar. These options work the same way as the Brush and Eraser tools.

Once you’re happy with how your product looks against the transparent background in Photoshop, you’re ready to save the image in a web-ready format.
You haven’t actually removed your background; you merely masked it from view. Therefore, in the future, you can return to this image and add the background back in if necessary.
Step 3: Save your image in the appropriate format
Creating a transparent background in Photoshop is just the first step—you need to save your product image in the correct format so it displays with a transparent background on your ecommerce website.
The best format to save your image in is as a PNG-24. This format allows for multiple layers of transparency, meaning your image will never have a pixelated "halo" when placed on a different color background. Older transparent file formats such as PNG-8 and GIF can create this undesirable halo effect, so whenever possible, use a PNG-24.
To save your file as a PNG-24 in Photoshop 2024, type SHIFT+ALT+CTRL+W (SHIFT+OPTION+COMMAND+W on a Mac) or choose File > Export > Export As… from the dropdown menu at the top of the application window.
Note: If you’re using an older version of Photoshop, and you don’t see the Export As... option, you can choose Save for Web and select PNG-24 from the Preset dropdown menu on the right of the dialog box.

In the dialog box that appears, under File Settings on the right side of the box, set the Format to PNG, and make sure the Transparency box is checked. Do not check Smaller File (8-bit)—this converts the file to a PNG-8.

On the left-hand side of the image you’ll see the file size predicted for your PNG file. This is important to keep an eye on because larger file sizes will make your web page load more slowly. It’s a good idea to keep web images at around 200 KB or smaller.
On the right-hand side of your dialog box, under Image Size, you have the option to adjust the dimensions of your image. Smaller dimensions mean a smaller file size. However, you don't want to make your image’s dimensions smaller than you want them to appear on your website, otherwise you’ll have blurry or pixelated images.
Also, with many of your customers viewing your product on a retina display, it’s good practice to save your product image at a size 50%–100% larger than the size you expect it to display. This will help it look crisp on all devices. In other words, if you know your product will show at 400px wide at its maximum, you'll want to make it at least 600px wide here.
So, you’ll need to work with a bit of balance to maximize your image size while minimizing your file size. To minimize load time, you can choose only to have your featured product images saved larger for retina displays, and allow the bulk of your product images to be saved at actual size.
Step 4: Save your file
Once you’ve set your Image Size to proper dimensions, click Export.
In the Save dialog box, choose the folder where you keep your web-ready product images. It’s a good idea to keep your optimized image files separate from your original image files to avoid confusion when loading your images onto your site. Name the image file and make sure its extension is set to .png.
Click Save.
You can now place your transparent product image against different backgrounds on your site and have it display perfectly.

How to create a transparent background for a logo in Photoshop
The logo you use on your website should always have a transparent background. That way, you have the flexibility to display it anywhere on your site, no matter what color the background of the page is.
However, if your logo is saved as a JPG, you’ll need to remove the background in Photoshop and resave your file as a PNG-24, just like for the product image in the example above. If you’re lucky enough to have a logo as a vector file (with extensions .AI, .EPS, or .PDF), you’ll need to open the file in Photoshop or Illustrator and convert it to a PNG-24 so it will be in a web-ready format.
Step 1: Open your logo file in Photoshop
In Photoshop, go to File > Open and navigate until you see your logo file. Click Open.
If you're opening a .JPG (or other raster format) file, the file will simply open in Photoshop.
If you're opening a vector format file, however, you'll need to make sure your settings are correct in the dialog box that appears:
- Crop To: set to Bounding Box
- Constrain Proportions: checked
- Mode: set to RGB Color (this might appear as sRGB with a specific profile)
Click OK.

Step 2: Make your background transparent
If you're working with a vector file, you can skip this step. If you're working with a JPG, however, you will need to select and delete the background from the image.
First of all, double-click the Background layer in the Layers panel and click OK to convert the Background to Layer 0.
Next, choose Select > Color Range… from the dropdown menu at the top of the application window.

A dialog box will appear. Make sure Sampled Colors is selected from the Select: dropdown menu at the top of the box. Use the left-most eyedropper in the dialog box to select the white background of your image.

Click OK.
You will now see the entire background of your image selected.

Now, in order to make the background transparent in Photoshop, simply hit the BACKSPACE button (DELETE on a Mac).

Step 3: Save your image as a PNG file in Photoshop
Follow Steps 4 & 5 from where we made a product image transparent above to export your file as a PNG-24. These steps are the same no matter what file format you started with, whether your original file was a JPG, AI, PDF, or other file format.
When you export your image, you'll notice that your file size is significantly lower than that of your transparent background product image. This is because logos tend to have only one or two colors, unlike the thousands of colors that exist in a product image. So you don't need to reduce your image proportions when you save your logo file. Keep your dimensions at the same size as the original file you have been working with, and click Save.
You now have the knowledge to create web-ready images with transparent backgrounds that will display beautifully without slowing down your site.
Photoshop transparent background FAQs
How do I make the background transparent in Photoshop white?
If you have a transparent background in Photoshop but you want a white background instead, create a new Layer in your Layers panel. Then, fill the new Layer with white by typing SHIFT+F5 (FN+SHIFT+F5 on a Mac). In your Layers panel, move your new, white layer underneath your original image layer.
How do I save a PNG with a transparent background in Photoshop?
To save a PNG with a transparent background in Photoshop, go to File > Export > Export As… or type SHIFT+ALT+CTRL+W (SHIFT+OPTION+COMMAND+W on a Mac). In the dialog box that appears, set the Format to PNG and make sure the radio button next to Transparency is checked. Click Export.
How do I remove the white background from a picture?
There are two very easy ways to remove a white background from a picture in Photoshop 2024:
- Select “Remove Background” from the Contextual Task Bar.
- Choose Select > Color Range… and select the white background using the Color Range eyedropper tool. Once the white background is selected, simply delete it.





![How to Create a Clipping Path in Photoshop [Updated for 2022] How to Create a Clipping Path in Photoshop [Updated for 2022]](http://pathedits.com/cdn/shop/articles/image14.jpg?v=1639448433)
